[work in progress]
3D-printed materials
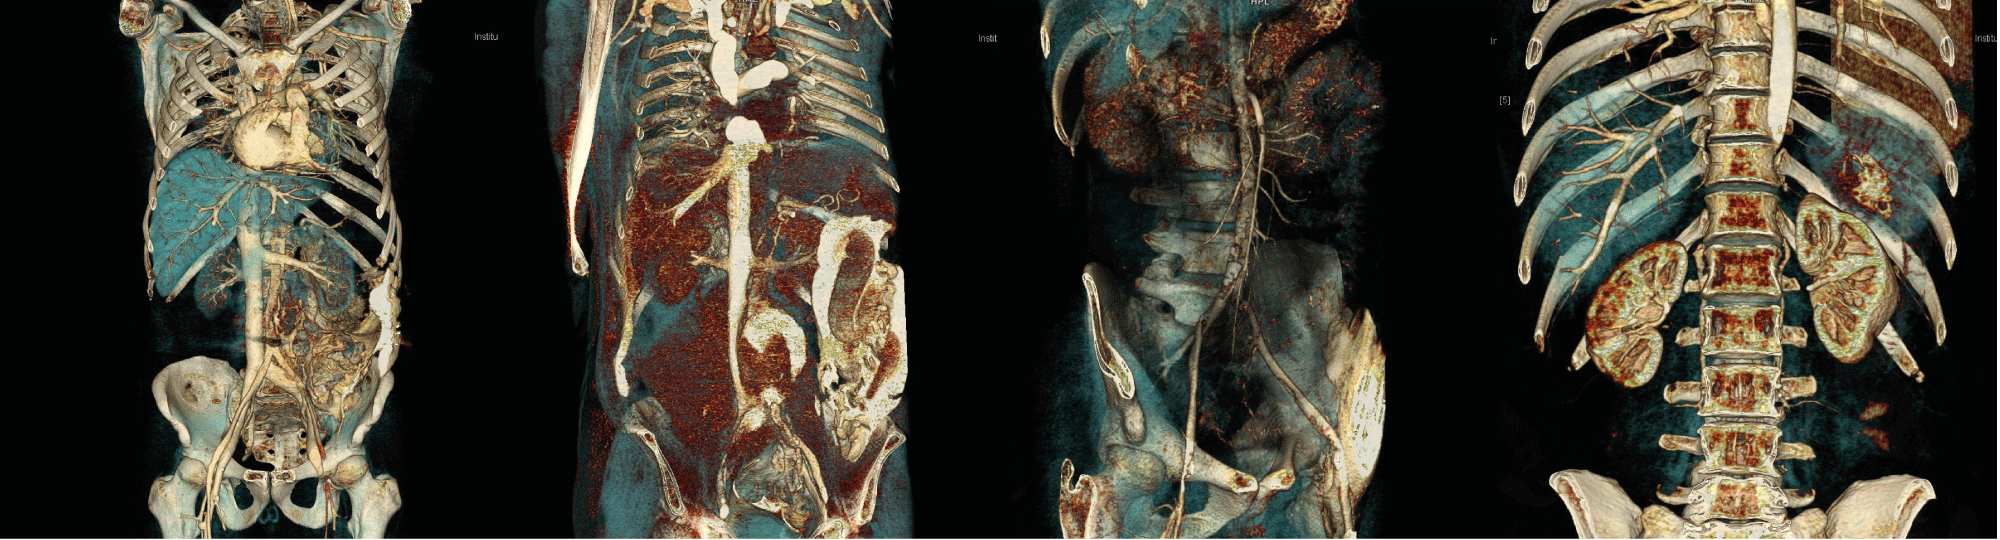
Post-mortem CT-angiography [or other angiography use]
These materials are explained and available on a separate page [link]
LED-lamp mount for point-and-shoot camera with hot-shoe flash-mount
Overview
To use a stable LED-lamp mount for your point-and-shoot camera with a hot-shoe flash-mount, you need a number of parts. These are:
- Step 1 – get one screw and a nut to hold both plastic parts together and to articulate the angle-lock mechanism, and a nut; we suggest an M5x30 (i.e., M5 threading, 30 mm length) screw and an M5 wingnut, however, any similar screw or nut might do as well (i.e., M5x25, x35, x40, ..) but the result might not be as convenient.
- Step 2 – get one screw to fix the lamp into place; there, it depends of what lamp you want to fix into place; if you use the suggested model, an M5x16 screw will be good, if the diameter of your lamp is a lot smaller then you may require a longer screw.
- Step 3 – get two screws (or one) to fix the lamp mount to the hot shoe; we would recommend a short M5 screw such as M5x16, M5x10 or so.
- Step 4 -get an LED lamp such as the ones we ordered from Aliexpress (diameter of cylindrical handle: 26mm).
- Step 5 – get the plastic parts 3D-printed and delivered to your place.
Lamp order
You will want one of the many differently branded versions of that lamp:
Metal parts
You need metal parts, where we suggest these (you may vary these as outlined above):
- 1 M5x30 screw
- 1 M5 wingnut (german: Fluegelmutter)
- 3 M5x16 screw
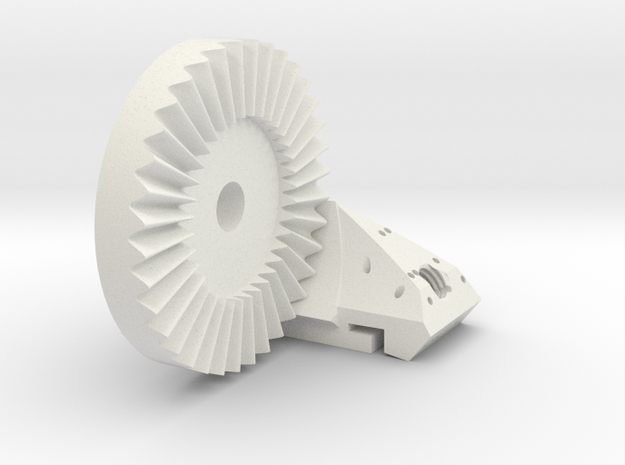
Plastic parts
Order them by a 3d-print-and-mail-service
If you want care-free superb quality, you will not get the lamp mount for only a few bucks. Conversely, it will feel better and hold up better. You can order both parts in various qualities here:
- Part 1 [link to order]
- Part 2 [link to order]
These models typically are ready-to-use or ready-to-mount.
Print them yourself
If you want to 3D-print the models yourself, here are the STLs and some extra clean-out instructions:
- clean out 3D models, there be careful with the threadings ; ) the screws will fit sometimes only with a bit of extra push …
- clean out the areas of the radial shape lock very, very carefully
- clean out the hot-shoe adapter extremely carefully; a knife might work best here
- (if you do not know these work-steps, please consider ordering these as indicated above)
If you want to upgrade a hex-nut to a wingnut yourself, you could even try 3d-printing an upgrade part for that [link].
Assembly
- get a lamp and the metal parts
- print out 3D models or get them printed
- first, assemble both plastic parts with the M5x30 screw and the wing nut
- then, put the lamp in and fix it into place with another screw
- last but not the least, slide the mount into the hot shoe adapter and slightly fix the screw to hold it in place there
Order lamp-mount from us as full assembly
We usually believe everyone is happy to tinker around, to 3D-print until all angles are perfect, and to then play with the assembly until that works as well. Cleaning the corners of this 3d-model is certainly at least somewhat challenging, admitted. But there may be people that may just want the thing ass assembled and ready-to-use, including lamp.
If you want such an option to be made available, please drop us a mail. Then we will re-consider the current absence of such an offer here.
Order camera and lamp-mount from us as full assembly
If you want such an option to order all parts – camera, lamp mount – to be made available, please drop us a mail. Then we will re-consider the current absence of also such an offer here.